Session Manager CPX
![]()
![]()
Select the Session Manager by double clicking on the slot and, if you have
more than one CD-ROM/CD-R(W) drive under ExtenDOS Gold's control, the CD-ROM
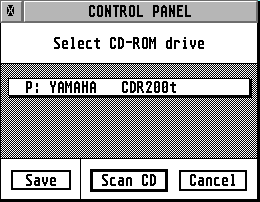
drive selection screen will be displayed, as shown below.

Clicking on the drive selection button will display a popup list of available drives; select the one you wish to access with the CPX. You may click on Save to save the selection you made as the default next time you open the CPX.
Once you have selected a drive, click on Scan CD to access the CD and prepare a selection list. The list produced depends on the type of CD that is currently in the drive: multi-session, or CDbackup.
NOTE: If you have only one CD-ROM/CD-R(W) drive under ExtenDOS Gold's control, the screen above will be bypassed, and the currently inserted disk will be automatically selected and scanned, producing one of the two types of list shown below.

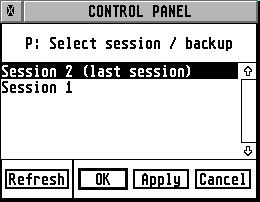
On this screen, you can click on a specific session, and then click on OK (to select the session and close the CPX), Apply (to select the session and leave the CPX open), or Cancel (to ignore the selection and close the CPX). If you change the CD in the drive while the CPX is open, you should click on Refresh to scan the CD and obtain a new selection list.
NOTE: the sessions that will be shown in the selection list depend on the drive firmware as well as the contents of the CD. Some older drives allow access to the first session only; more recent drives allow access to the first and the last session; most current drives (including CD-Rs and CD-RWs) allow access to all sessions.

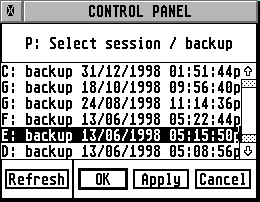
On this screen, you can click on a specific backup, and then click on OK (to select the backup and close the CPX), Apply (to select the backup and leave the CPX open), or Cancel (to ignore the selection and close the CPX). If you change the CD in the drive while the CPX is open, you should click on Refresh to scan the CD and obtain a new selection list. When you switch between backups, even on the same CD, the switch is automatically recognised as a media change, and the new partition is mounted.
IMPORTANT: Unless you are running under MiNT or MagiC, you will not be able to access a backup from the desktop if the CD-ROM drive has a letter greater than P. This is a TOS restriction.
![]()